Making a Whole Gun with CNC

Jason and I have discussed the idea of making an entire firearm with the CNC machine. Currently, he’s only made two AR-15 style receivers, which is the part of the gun that is legally considered “the gun,” but the rest of the parts were purchased as parts kits. It is lawful to make your own guns, provided you’re not doing it to sell or transfer them. If you want to do that, you’re considered in the business of manufacturing, and need to possess a Federal Firearms License. The point in the project was to show the folly of gun control, and to have a little fun in the process. While I think some progress has been made in that regard, it still leaves open the argument that the hard parts are still purchased, so clearly a hypothetical person could be stopped merely be restricting parts of guns as heavily as guns.

But really, the only thing that makes a lot of this hard is the legal aspects that already exist. The difficulties Jason has experienced is mostly just in the learning process. He’s not trained as a machinist, and has never tried this before. The goal is to try until success, and that takes trial and error in wasted aluminum and plastic. Once success is achieved, replication would be trivial, but since we’re law abiding here, there’s no need to do that. A one off success is completion of the project.

So what about making a whole gun? The hard part is the barrel. Barrels have to be a hard steel, and hard steel is expensive and difficult to machine. The law also requires pistols to have a rifled barrel. If you do a smooth barrel firearm on the scale that’s easy to do on this small mill, you generally have an NFA firearm, which you can’t just manufacture willy nilly legally. Speaking of NFA, it would probably be easier to design a simple submachine gun than it would be to design a reliable semi-automatic pistol. But again, because we’re law abiding here, that’s off the table.

The idea of doing an entire home-made CNC pistol, with equipment that is within the reach of the hobbyist, is still a pipe dream. For someone who wishes to remain law abiding, it’s risky business not sticking to traditional designs. Criminals would not have this limitation, and thus would have an easier time.

More Homemade AR-15 Lowers

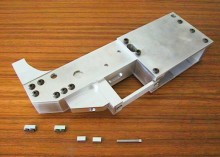
Jason sent this link along to me yesterday, which shows another AR-15 lower design that someone came up with. Looks pretty simple, and definitely wouldn’t take all that much machining. The only thing that concerns me about deviating seriously from the standard AR design is whether an argument could be made it’s readily convertible to an M16 receiver. I believe AR-15 lowers have some extra metal in them to prevent insertion of a drop-in auto sear (DIAS). They also have the advantage of having been reviewed by ATF. I’ve heard ATF frowns on designs where conversion is just a matter of drilling a new hole. But I also believe (correct me if I’m wrong) that once you drill the holes for the AR-15 trigger group, being that they’re differently sized pins, it essentially won’t hold an M16 trigger group anymore, so that really no modern AR design can really be construed to be readily convertible. I’m wondering whether there should be any concern about a design that hasn’t been submitted to ATF in order to make a determination. Any comments?

I should also note that this is only a concern for people, like you and me, who don’t want to break the law. Criminals wouldn’t have any such compunction.

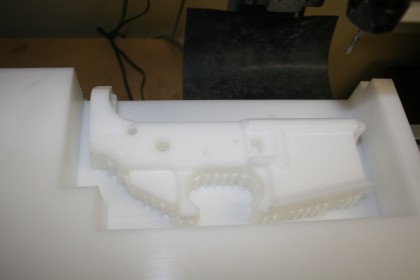
How to CNC an AR-15 Lower from Delrin

UPDATE (From Sebastian): If you choose to make a lower from Delrin, you’re safest using Food Grade Delrin, which is highly x-ray detectable. While I believe ordinary Delrin should be dense enough to be detectable by the modern equipment used for airport screening, it is unlawful to make a firearm, the major component (which includes the receiver) does not show its true shape on the types of x-ray equipment commonly used for airport screening. Be careful about the types of plastic you choose. Jason did not mention this in the original post, but I am updating now as a warning. You are responsible for compliance with federal law.

After finishing the aluminum bolt together lower, I went back to trying to make a single piece lower out of Delrin.

The process described below is my third attempt. In the first two I had alignment problems which made the right and left sides not quite match up and gave an egg shape to some of the holes.

I also switched from PyCAM to Deskproto. While the people working on PyCAM have done a nice job so far, it needs more work. For the kind of things I do its just barely useable. Deskproto has all the things that drive me nuts in PyCAM fixed, and while its commercial, the cost, especially for a hobby license, is quite reasonable (less than an AR-15 parts kit) and it doesn’t use any nasty DRM, so after you’ve purchased it you don’t have to get permission from the mother ship to reinstall it or install it on a different computer.

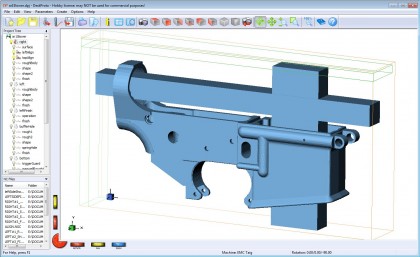
In Deskproto, I added support bridges to the model that run through the buffer tube hole and magazine well.

This way I could use the outside edges of the Delrin block for holding down the part while machining the left and right sides, but don’t need to do extra machining steps later to remove the supports.

Update: The 3d model of the lower is originally from www.cncguns.com.


I used an inexpensive Chinese import band saw to cut the block of Delrin down to an appropriate size….

Continue reading “How to CNC an AR-15 Lower from Delrin”

CNC Milled AR-15: Final Painting

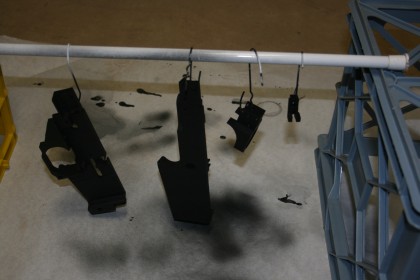
To finish up the AR-15 pistol I milled on my CNC machine, I decided to try Alodine and then Duracoat instead of anodizing. I wanted a process I could do myself, and while I probably could have managed anodizing at home, the process seemed more complicated than I wanted to get into right now, nor do I have a good place to set things up. Buckets of acid wired to a high current power supply aren’t a good things to have lying around with small children in the house.

The basic process is to coat the parts with Alumiprep (a phosphoric acid based etcher/cleaner), wait a few minutes, rise with water, coat with Alodine, wait a few more minutes, rinse with water, let dry, and then airbrush on Duracoat.

The first attempt at applying Duracoat didn’t go so well. After I was done I noticed a few tiny areas around some bolt holes that I missed. I decided to just mix up a little Duracoat in a cup and do some touch ups with a brush. This turned out to be a bad idea for two reasons. One, Duracoat doesn’t look the same when its brushed on. The instructions do say only to airbush it, but I though that for such a small area (1mm so square) it wouldn’t matter. But it does. Two, Durocoat dissolves plastic cups. After I was done when I picked up the cup the bottom fell out and I ended up with paint all over my work table. Luckily Duracoat wipes off pretty easily if you get it before it dries.

Then when I went to assemble the gun, even though I waited the recommended 24 hours for the paint to dry, it chipped off in a few places. Argh! So I airbrushed on a few more coats..

…and then put the parts in the oven at 120 degrees for a hour to speed dry it. This time there was no chipping and no funky spots from the brush touch ups.

CNC Milled AR-15, The Test Firing

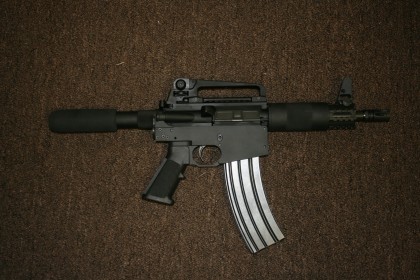
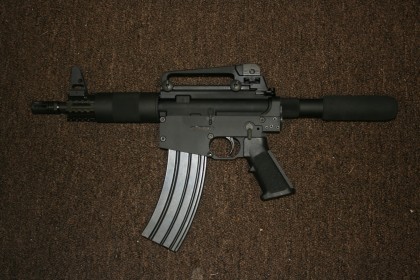
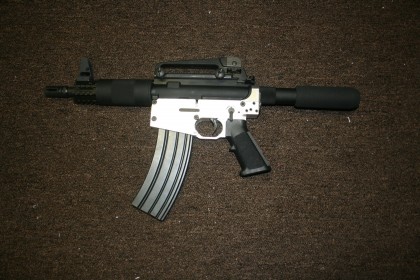
Jason and I made it out to the range Christmas Day to try out the AR-15 pistol that Jason turned out on his CNC mill, documented here and here. After fussing around a bit dealing with FTEs, it was determined that the pistol just likes hotter ammo. Using either the reloaded ammo Jason was using, or my reloads, which I don’t load very hot, it had FTEs all too often. But it worked rather flawlessly with NATO spec 5.56×45, which the upper is rated for. Here’s the video I took:

I think the best way to shoot an AR-15 pistol is to get a good cheek weld on the buffer tube. The tube is too short to use as a stock, and is not designed to be used as one, so it avoids being an SBR, but the recoil is so low that a good cheek weld helps in aiming. It is entirely comfortable to shoot the pistol as a pistol, one handed, or with both hands, but you can get better accuracy resting your cheek on the buffer tube.

Mechanically, for some reason, the buffer retaining pin got sheared off, but I think Jason has decided not to bother replacing it. With this modified lower, it requires tools to remove the upper, so it’s not a huge deal to just hold the buffer in while the upper is put back into place.

This goes to show the fallacy of gun control. All it took to manufacture this was a CAD drawing downloaded from the Internet, a Linux machine to control the mill, a block of aluminum, some time, and a willingness to spend a few days cleaning aluminum bits off the floor of your shop.

No doubt our opponents will call this a “loophole” in the law, which allowed Jason to manufacture a high-powered pistol out of a block of aluminum, with no serial number, no background check, and no government official overseeing the endeavor. But make no mistake, it’s not unregulated. This was made for personal curiosity. It would be unlawful to make firearms for resale, without a manufacturer’s license, and would also be unlawful to make this firearm with a stock, which would make it a short barreled rifle. All those legal issues were avoided in this endeavor. But I can promise you, there are individuals out there for whom this is appalling, and who would likely try to restrict this technology.

But the genie has thoroughly gotten out of this bottle. None of the equipment used in this project is so horrendously expensive that it’s out of the reach of hobbyists in terms of price. Jason is not a trained machinist, and neither am I. My message to our opponents is to give up. Gun control as as fantastical now as unicorns. Technology will just no longer allow it to work.

CNC machining an AR-15 lower update and slight detour

In the comments of my last post, Grego pointed out firearmfiles.com where there are CAD files for a multi-part AR-15 lower where all the parts fit nicely in the working area of a Taig mill. It also doesn’t require any special jigs or the crazy long, thin drill bit for making the hole for the bolt catch pin. Since I wouldn’t need to make any jigs or buy any drill bits to finish that version, I figured I’d try it before continuing on with the normal one-piece lower. I went straight to aluminium since I had a slab the right thickness.

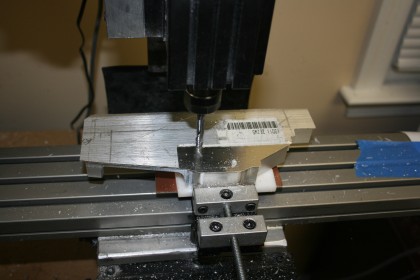
Starting to mill the left half of the lower out of a slab of aluminium.

After the end of the roughing pass, where you can see some pretty crappy edges because I was making cuts that were too aggressive for the Taig.

After a couple of contouring passes to give it the right shape.

After the finishing pass.

Now, use a band saw to cut off the excess aluminium block, flip the part over, and start roughing the other side.

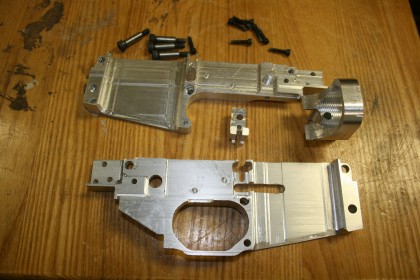
The four completed parts of the lower and the bolts that hold them together.

The finish is funky on the inside of one of the halves because, due to software issues, I was having trouble getting accurate Z positioning.  I managed to fix the problem for the other parts.

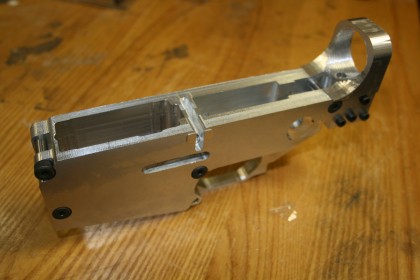
The assembled lower.

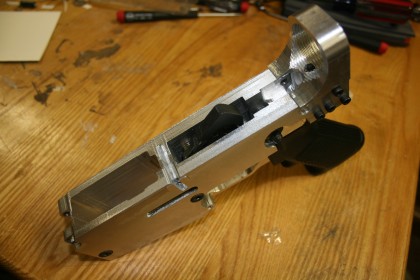
With the fire control parts installed.

And, finally, the completed firearm.

That’s everything except the bolt catch. Since the bolt catch is held on by a press in roll pin, I’m going to leave that off until the lower is painted, rather than have to press it out again to do the painting.  My plan is to treat with Alodine and then spray on Duracoat. I think that should work out pretty well, and it is easier than anodizing.

I modified the design a bit from the original. My version is thinner (though still not as thin as a standard AR lower), and instead of using a custom extended selector switch, I cut a recess so that a standard selector switch would fit.

Now that that’s done, I’m going to try to finish the one piece Delrin lower. But first, I think I need to make some sort of enclosure for the mill to keep the chips from getting all over the place. When working on parts that big, it makes a hell of a mess. Normally, when I use the mill for work, I’m just working with small Delrin parts, making cutouts in aluminium sheets, or etching small printing circuit boards.

CNC machining an AR-15 lower

The following is a post by my friend Jason, who is not a regular contributor, but has posted in the past on our 3D magazine printing project. I thought this would be an interesting addition, and a demonstration of how technology is making gun control a virtual impossibility. Below is his post.

-Sebastian

I’ve been meaning to try this for a while now (using the AR-15 lower receiver solid model from http://www.cncguns.com/downloads.html), but I wanted to do it using all open source software, and was having trouble finding something that could generate tool paths from the AR-15 model. PyCAM seemed to be the best bet, but whenever I tried it on very complex model it would very quickly use up all the memory (8GB of ram plus 8GB of swap) and bring the computer to a screeching halt.

I recently had a project at work where I needed to make a much simpler part, and not wanting to go back to using BobCAD under Windows, I gave HeeksCAD and PyCAM a try. It worked out pretty well, and in the process I discovered and fixed a memory leak in PyCAM

PyCAM is still horribly inefficient in its memory usage, but with the memory leak fixed and a new computer with 16GB of ram I was finally able to generate decent toolpaths for the AR-15 lower.

The equipment/software:

So now I’m all set to give this a try, but I can’t find the block of aluminum I had intended to use. But I did have a block of Delrin left over from an earlier project, and Delrin should be strong enough to handle a .22 cal upper. So I’m trying to make a delrin lower first for use with a .22 cal upper, and if that works I’ll order some aluminum and make another lower for use with a .223 upper.

Note that I’m not an expert in material properties (nor a machinist) so don’t take the above statements to mean that its safe to fire an AR-15 made of Delrin. Do at your own risk.

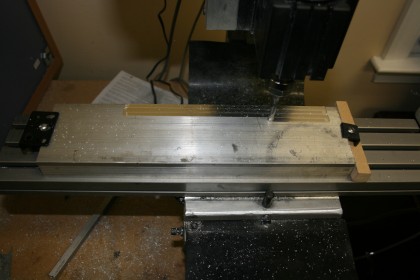
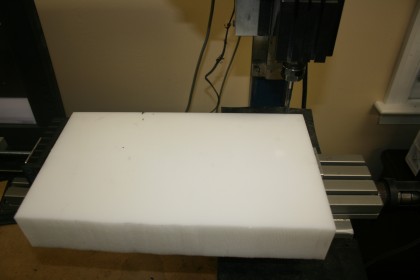
The original block of Delrin.

Original Block of Delrin to Make into AR-15 Lower


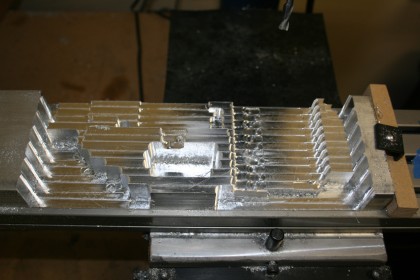
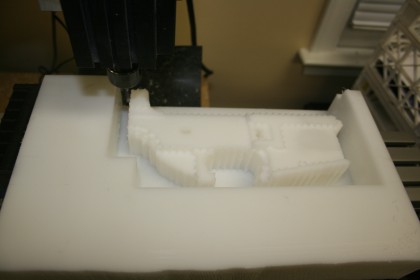
After a first pass rough cut with a 0.25″ diameter end mill.

First Cuts with CNC Mill AR-15 Delrin Lower Receiver


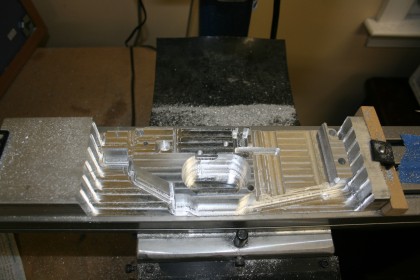
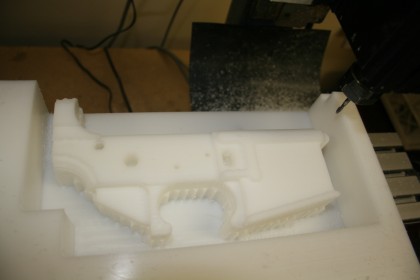
After a second pass using a 0.125″ end mill and a much smaller grid size.

Second pass with CNC mill on Delrin block to make AR-15 lower


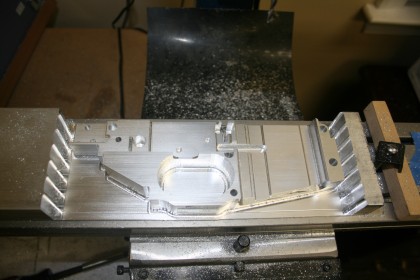
After a finishing pass with a 0.125″ ball nose mill.

Final Pass AR-15 Lower Delrin CNC


Now things are going to get a little complicated. I’m going to have to make some sort of jig to hold the part in place while I machine the other side.